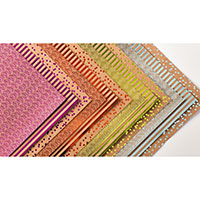
Today I have a Top Flip Card for you. This card was cased from Dawn Griffin. I love how the Foil Frenzy Specialty Papers is the show stopper in these cards.
Quick easy put together with a WOW factor.
So lets get started with measurements
Card Base ~5 1/5 X 4 1/4 Crumb Cake
Colour Layer on base ~ 5 1/2 X 3 3/4 Sky Blue
White inside liner ~ 5 1/2 x 3 1/8 Whisper White
Foil Frenzy top panel ~ 6 x 3 1/4
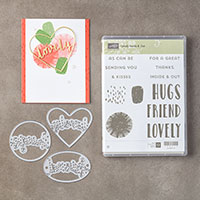
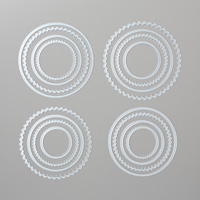
You will also need square basic grey and soft sky pieces for Lovey Words Thinlit "hugs" and Layering Circle framelits to cut the scallop frame and centre hole in front panel.
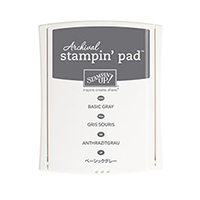
You will need your Big Shot, a scoring tool, adhesives , Basic Grey and Soft sky ink pads and Lovely inside and Out Stamp set. ( this comes as a Bundle with the Lovely Words Thinlits for a 10% savings) **See promo at bottom of page of gift with purchase
Score the Foil Frenzy piece at 5 9/16. Then using one of the circle Framelits cut a circle in centre towards top.
Use the Lovely Thinlits 'Hugs' and cut out in basic Grey with the big shot them use next size up in circle dies to cut it our to make a fine frame around the outside.
Use one scallop and one plain circle framelit (the one used to cut the circle out of the card front) together to create a frame piece to frame in the circle on the front of the card. Once both are done you will glue the "hugs' onto the backside of the scallop frame do not glue on front yet!!
Now you just need to assemble the layers. You need to fold the top edge of the foil piece where it was scored and glue that top tab over the top edge of the Soft Sky layer. I used Fast fuse to adhere it to the back. Then the soft sky can be glues onto the Crumb cake base. This hides the attachment of the top fold card front between the layers.
Now slide the Whisper White layer in under the front panel into position. Close the front panel so you can now stamp your image through the top opening so you get it entered perfect. Once you are happy with the stamped image...glue the white layer onto the Soft Sky.
Now just glue your Hugs framed piece around the opening on the front. Add a saying to the bottom front of the card.
Finished!!
To purchase any of the supplies used in todays card go to my ONLINE STORE it is open 24/7 If you have any questions please contact me at suephilipcda@gmail.com
**Purchase the bundle used today and I will send you a free card kit (to make 4 cards) as well as a pre-cut package of the pieces in todays card so you can make it easy.**
Thanks so much for stopping by and please comment below as I would love to hear from you.
Cheers
Sue
Here are todays Key supplies








No comments:
Post a Comment